Canceling the wrong appointment — or more of a recurring series than you intended — can create real problems for your crew and your clients. ProTeams makes you confirm exactly what you’re removing before anything is deleted.
Overview
ProTeams allows administrators to cancel scheduled appointments directly from the Scheduler. The cancellation process includes a review screen, a confirmation step, and a final success message to ensure appointments are not removed accidentally.
This guide walks you through each step of canceling an appointment safely and correctly.
Open the scheduled appointment
- Go to Appointments → View Schedule
- Locate the appointment you want to cancel on the calendar
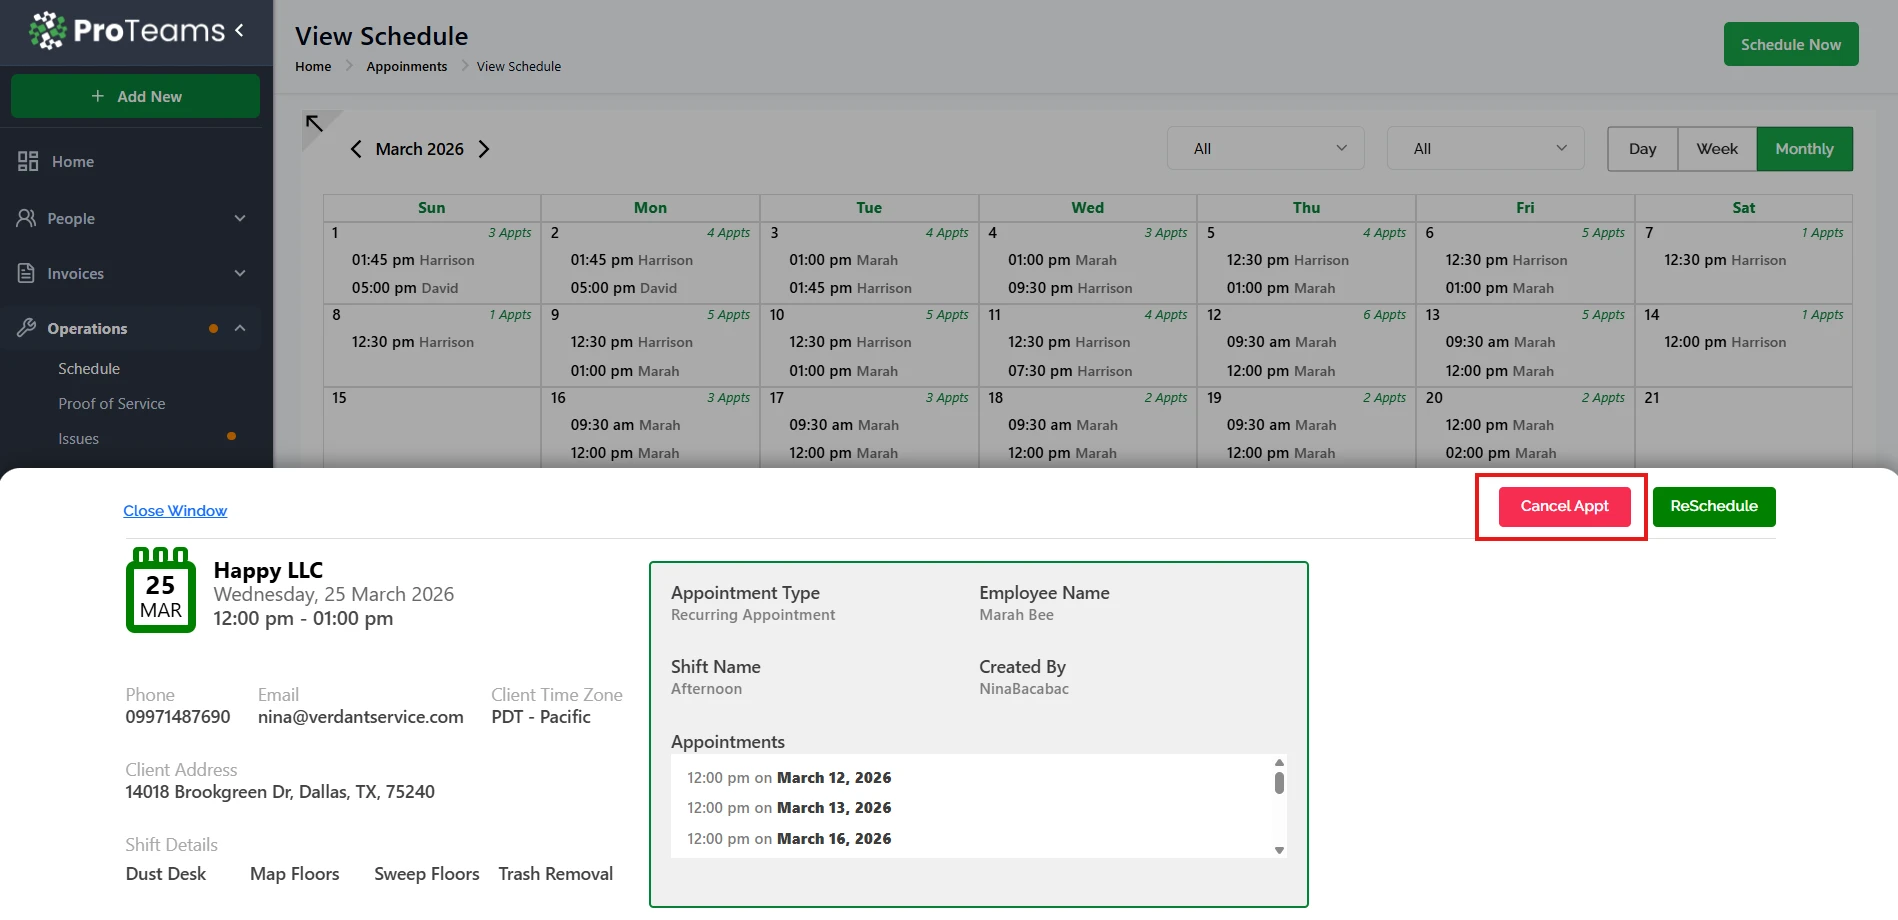
- Click the appointment to open the Appointment Details view
This screen displays all relevant information about the appointment, including:
- Client name
- Appointment date and time
- Employee assigned
- Shift name
- Client time zone Contact and address details
Click “Cancel Appt”
On the top-right corner of the Appointment Details screen:
- Click Cancel App
This action does not immediately cancel the appointment. It opens a confirmation step to prevent accidental deletions.
Review the cancellation confirmation
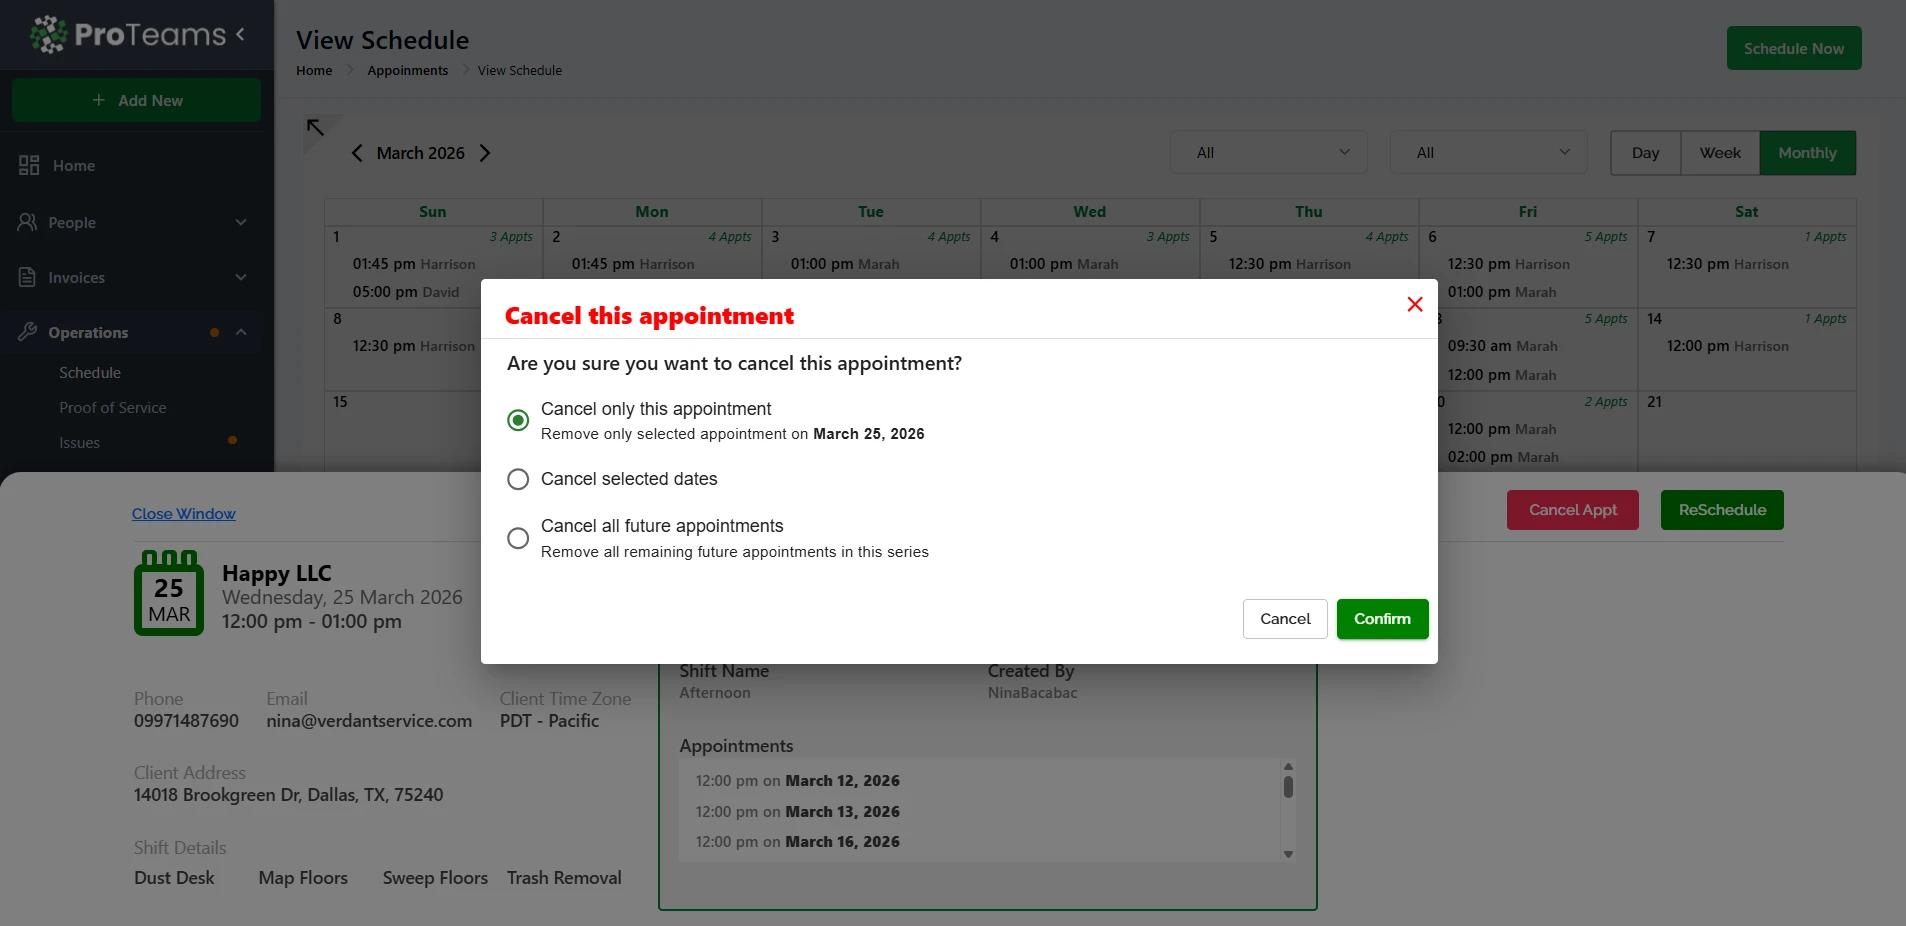
A confirmation modal titled “Cancel this appointment” will appear.
This modal displays:
- Client name
- Appointment date
- Start time and end time
- Assigned employee
- Employee time zone
Review these details carefully to ensure you are canceling the correct appointment.
Cancellation Options Explained
Cancel only this appointment
- Cancels only the selected appointment
- Other scheduled dates remain unchanged
- Example: Cancel March 25, 2026 only
✅ Best for one-time changes
Cancel selected dates
- Cancels multiple specific dates in the series
- You will choose which dates to remove
✅ Best for skipping a few days without affecting the full schedule
Cancel all future appointments
- Cancels the selected appointment and all upcoming ones in the series
- Past appointments remain untouched
✅ Best for ending a recurring schedule completely
Confirm or stop the cancellation
You have two options:
- Do Not Cancel Closes the modal and keeps the appointment active.
- Confirm Proceeds with canceling the appointment.
Click Confirm to finalize the cancellation.
Appointment deletion confirmation
After confirming, ProTeams will display a success message:
“Appointment Deleted Successfully”
This confirms that:
- The appointment has been removed from the Scheduler
- The appointment is no longer active in the system
- The employee will no longer see the appointment in the mobile app
- Associated tracking and alerts are stopped
Click Close to exit the confirmation message.
What happens after an appointment is canceled?
Once canceled:
- The appointment disappears from the calendar
- The employee’s schedule updates automatically
- No further alerts or time tracking will occur for that appointment
- You may reschedule a new appointment if needed
Important notes and best practices
- Canceled appointments cannot be recovered
- Always review the confirmation details before clicking Confirm
- If the appointment needs to be moved instead of removed, use Reschedule rather than Cancel
- Time zone information is shown to help avoid canceling the wrong appointment
Summary
Canceling a scheduled appointment in ProTeams is a controlled, multi-step process designed to prevent mistakes. By reviewing appointment details, confirming the action, and receiving a success notification, admins can confidently manage schedule changes without impacting the wrong employee or client.
Canceled appointments cannot be recovered. If the appointment needs to move rather than disappear, use Reschedule instead.